Friday, December 25, 2009
Idea- Robot movement
Create a Robotics platform that moves in a particular direction when using a circular joystick. This would result in more intuitive controls, and much steeper learning curve. The Robot will travel in the direction that you point the joystick relative to the users position. With this type of system, directing the robot to go to the left would actually be telling it to travel counterclockwise around you. This type of control can be achieved using 3 antennas, Triangulation, and Phase detection. The direction from which the signal is received can be determined by analyzing the phase shifts between signals allowing the robot to determine what it's correct path of travel should be.
Tuesday, July 7, 2009

 This Is the first test in my research where I read the output of a 3-axis accelerometer and record the maximum acceleration it has seen. The PIC 18f4520 that I used on the EasyPIC5 development board, was programmed to display the current readings and maximum seen value when I press the D.0 button. As you can see in the pictures above, It shows the acceleration readings for each axis, and the max seen value in the top left. This week I intend to do the compass test, provided that the code is small enough, and later, when demo is unlocked I will test the SD card write capabilities. As the SD card and the Compass module must use the same SPI connection on the PIC microcontroller, I intend to create a circuit that will use a transistor to switch the clock signal between the two devices.
Monday, June 8, 2009
Final Update of Final project


It is finished, My plans for WORLD DOMINATION!! But I digress, Here are a few pictures of my Robo-Fish. From top to bottom we have:
The Workstation:
This is where the Masterminding Happens. And no that is not a plate of eaten food, It is a plate of wet napkins that I used in lieu of a sponge to clean the soldering iron.
Bottom tier beta:
This is the main power and motor tier. Here lies the Power regulator to decrease voltage from input power of 9V to 3V for powering the motors. The resistor core seen in this picture functioned to burn off the excess power from the zener diode. Once the zener diode burned out,
I switched to using an adjustable power supply(not seen in photo). This tier also houses the Capacitors that keep the energy for when the robot isn't connected. It also has the motor and its controller which I controlled through simple serial commands. The aluminum posts and the three pin header to the right of the motor controller are used to communicate and transfer power between the two tiers. The electrical tape wrapped around the lower left tier is used to prevent other wires from touching it. It is the only shaft that is tied to 9v as the other ones are tied to ground. The three pin header transfers 5v from the microcontroller, Serial data and the reset pin connection.
Top tier:
Here we can see the Basic stamp 2 connector, the reset button, ir transmitter and ir reciever. The ir transmitter is the large black post on the right side. The ir receiver is located on the left side of the basic stamp and it is capable of detecing how far an object is away from the ir transmitter/reciever combination. The pair is capable of detecting 5 distances and responds in a increasingly nervous recation for each tier.
Finalization:
This is the completed project. Aluminum foil was originally used as the ground conductor but due to its soft nature it would deform and the robot would get stuck. I made the ground into a copper plate and it works very well now. The resistor fisherman in the background is seen fishing for the robot, which is wearing the aluminum foil hat. The hat is used to provide power to the robot.
A video of thhe robot can be seen at
http://www.youtube.com/watch?v=9X4pfTDldhA
This is the code I used for the robot: Pleaase forgive if it has a few redundencys
' {$STAMP BS2}
' {$PBASIC 2.5}
jitter VAR Byte
speed1 VAR Byte
speed2 VAR Byte
i VAR Byte
dist VAR Byte
irdet VAR Byte
irfreq VAR Word
freqsel VAR Nib
start:
LOW 0
PAUSE 2
HIGH 0
PAUSE 100
SEROUT 1, 84 , [$80,2,2]
PAUSE 2
LOW 0
PAUSE 2
HIGH 0
PAUSE 100
SEROUT 1, 84 , [$80,0,(4 ), 100]
SEROUT 1, 84 , [$80,0,(6 + 1), 100]
PAUSE 100
SEROUT 1, 84 , [$80,0,(4 ), 0]
SEROUT 1, 84 , [$80,0,(6 + 1), 0]
Main:
DO
dist=0
FOR freqsel = 0 TO 4
LOOKUP freqsel,[37500,38250,39500,40500,41500], irfreq
FREQOUT 14,1,irfreq
irdet = IN2
dist = dist+irdet
PAUSE 1
NEXT
DEBUG DEC dist
GOTO Control
LOOP ' repeat forever
END
Control:
RANDOM jitter
IF dist = 5 THEN
speed1 = jitter & 011111
ELSEIF dist =4 THEN
speed1 = jitter & 011111
ELSEIF dist =3 THEN
speed1 = jitter & 0111111
ELSEIF dist =2 THEN
speed1 = jitter & 0111111
ELSEIF dist =1 THEN
speed1 = jitter & 111111
speed1 = speed1 | 100000
ELSEIF dist =0 THEN
speed1 = jitter & %01111111
speed1 = speed1 | %01000000
ENDIF
RANDOM jitter
IF dist = 5 THEN
speed2 = jitter & 011111
ELSEIF dist =4 THEN
speed2 = jitter & 011111
ELSEIF dist =3 THEN
speed2 = jitter & 0111111
ELSEIF dist =2 THEN
speed2 = jitter & 0111111
ELSEIF dist =1 THEN
speed2 = jitter & 111111
speed2 = speed2 | 100000
ELSEIF dist =0 THEN
speed2 = jitter & %01111111
speed2 = speed2 | %01000000
ENDIF
SEROUT 1, 84 , [$80,0,(4 + (jitter >> 7)), speed1]
SEROUT 1, 84 , [$80,0,(6 + (jitter >> 7)), speed2]
PAUSE 100*dist
GOTO Main
Monday, May 18, 2009
Feel of Robot Update
I have a lot of work ahead of me. I am having problems with the transmitters and receivers I bought as they do not work properly. I will be working on them today and should have them up and running as of Wednesday. I have found a free recliner this time and intend to pick it up assuming that someone is willing to drive me. I intend to work on and complete the maze this week, so that all that would be needed would be the table. so the layout would be Maze and robot will be completed this week, and the recliner and table next week.
Sunday, May 10, 2009
Make-Shift
Tuesday, April 28, 2009
Feel of Robot

This is the first draft of my final project for physical computing. The idea of the project is to give the user control over a robot withought the sense of sight. It would send all sensor data to the person by their sense of touch only. Ideally, the person would then become "one" with the robot and their brain would no longer feel the data, rather it would understand it.
This project bring humans closer to the machines they control, and in certain ways, one with what they are controlling. For what is any tool but an extension of one's own body.
Monday, April 20, 2009
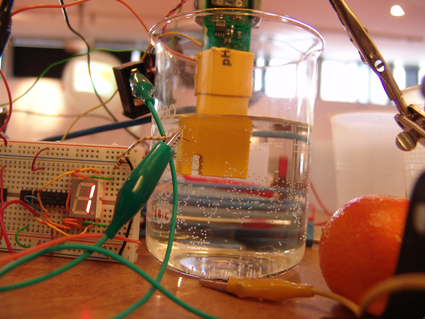
Fruit computing!
Sunday, April 19, 2009
Waistcloth-smattered-retroacted_walkerbot Update!!
Waistcloth-smattered-retroacted_walkerbot


The Walkerbot lives! Here are some pictures of the walking Waistcloth-smattered-retroacting_walkerbot. Notice the carriage behind the walker bot. This carriage is the power-source for the walker, not only does it supply energy, but it also represents a simpler time when carriages were used and waist cloths were worn.
The legs at the front of the robot represent an evolution in locomotion ideas throughout time. While both front and rear servos are powered, the legs can take the robot past obstacles that the wheels cannot. Like in the evolution of robotics, in response to obstacles that wheels cannot transverse, legs began to be used.
This design shows a smattering in the field of robotics, as the power supply is so far separated from the drive and systems on the robot. Any snag or jam will make the power supply disconnect from the robot without any backup. The robot then dies and can no longer travel. In this design it is also possible that the robot forces the power disconnect itself, which is never a good idea (spare Asimov's 3 laws).
Code used:
//Robotization, Waistcloth, Smatter, Retroact
// Konstantin Avdashchenko
int valu;
void setup () {
// set 9 and 10 and the outputs to the servo controls
pinMode(9, OUTPUT);
pinMode(10, OUTPUT);
}
void loop(){
// read a potentiometer value and command servo speed according to it.
valu = analogRead(0);
analogWrite(9,valu/4);
analogWrite(10,255-valu/4);
delay(10);
}
Wednesday, April 8, 2009
Augor
Adam Flores
Adam Flores:
Various interesting drawings often dealing with wood, trees, houses and cliffs.
http://www.adamaflores.com/works.html
Various interesting drawings often dealing with wood, trees, houses and cliffs.
http://www.adamaflores.com/works.html
Subscribe to:
Comments (Atom)


